
Welcome
Welcome to the DataCaster QuickStart Guide. This guide details the initial steps to follow for setting up and configuring the DataCaster.
Included in the Box
- DataCaster device
- HDMI cable
- 5V 1A USB power adapter
- USB power cable
Requirements
- Display (television or monitor) with HDMI port
- USB Keyboard (for initial configuration only)
- Web browser
- Access to a wired or wireless network connection
Getting Started
To begin using the DataCaster, set up the device and connect it to your network.
Set Up and Configure the DataCaster
To set up the DataCaster, complete the steps in the order below:
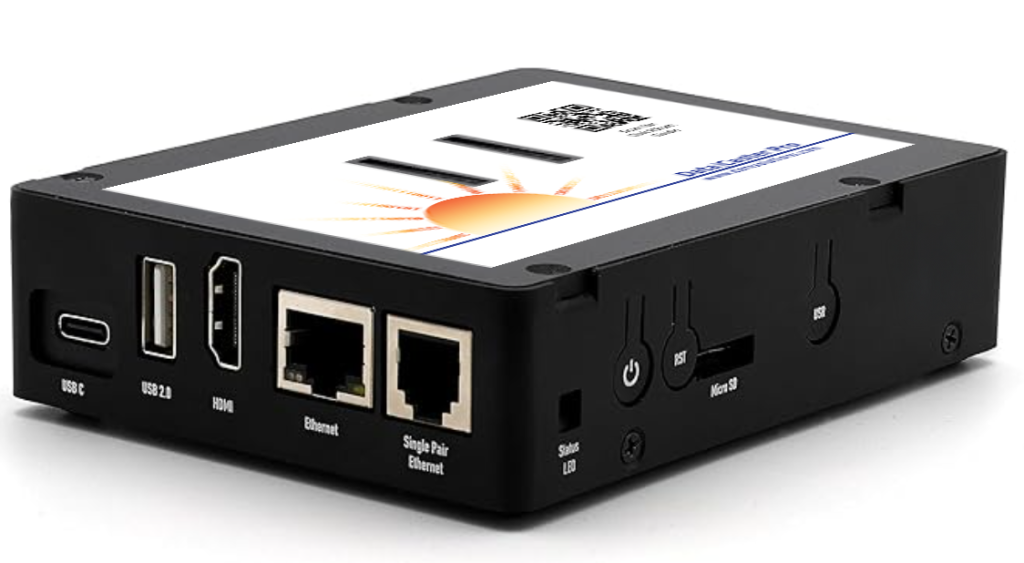
- Connect DataCaster to the display using the included HDMI cable.
- Connect the keyboard to the USB port on the DataCaster.
- Connect USB power supply to the DataCaster. When the DataCaster is powered up (within one minute), the Configuration screen appears on the display.
- On the Configuration screen, use the arrow keys on your keyboard to navigate to Security.
- In the Security section, navigate to the Password field, then Set Password.
- Type the password you would like to use and press Enter.
- Set the time zone:
- Press the Esc key to exit the password field.
- Navigate to Time Zone.
- Select the time zone and press Enter.
The DataCaster is now ready for network connection.
Configure a Network Connection
Connect DataCaster to your network using either a wireless or wired connection. Instructions for both are detailed below. Follow the instructions that match your environment.
Wireless Network Connection
To connect the DataCaster using a wireless connection:
- On the Configuration screen, navigate to the Network section.
- Select Wireless, then select Access Points.
- Select the SSID for the Access Point to use.
- Type the network key (password) for the selected SSID in the Password field.
The DataCaster is now connected to the network. - Set the IP address for accessing the interface via web browser:
- For static IP (recommended), navigate to the field next to the one already highlighted and type the new IP address.
– OR – - For DHCP, press F5 to view the IP address to use in the browser
The DataCaster is now connected to the network.
- For static IP (recommended), navigate to the field next to the one already highlighted and type the new IP address.
Wired Network Connection
To connect the DataCaster using a wired (ethernet) connection:
- On the Configuration screen, navigate to the Network section.
- Select Wired. The IP address acquired upon powering up appears.
- If necessary, manually configure the IP address by navigating to the field next to the highlighted one and type the new IP address.
- Set the IP address for accessing the interface via web browser:
- For static IP (recommended), navigate to the field next to the one already highlighted and type the new IP address.
– OR – - For DHCP, press F5 to view the IP address to use in the browser.
The DataCaster is now connected to the network.
- For static IP (recommended), navigate to the field next to the one already highlighted and type the new IP address.
The DataCaster Interface
Once configuration is complete, use any web browser on your network to access the DataCaster interface. To access the interface:
- Open a web browser.
- In the address bar, type the IP address assigned to the DataCaster during network connection. The DataCaster interface appears in the browser window.
- Use the navigation on the left side of the browser window to configure the display and connect to your data source.